💾 Back up your Organisation Recovery Key
This section is intended for the Organisation Owner only.
As the Organisation Owner, you are responsible for keeping your Organisation Recovery Key safe. If you lose it and no device belonging to an Organisation Owner or Organisation Manager holds the Organisation Key, the Organisation Key cannot be recovered. The organisation must then be reset, removing all protection plans.
You can back up your Organisation Recovery Key in one of two ways: use Inheriti® 2.0 (Personal) to create a backup plan and store your recovery plan share, or manually write down your recovery key and keep it somewhere safe.
You choose your backup method when you create your organisation, and that is the only time the key is shown or prepared for backup. If you choose Inheriti® 2.0 (Personal), you can finish setting up your organisation first and complete the backup later.
Choose your backup method
Option 1: Back up with Inheriti® 2.0 (Personal) Suggested
Why use Inheriti® 2.0 (Personal)?
Inheriti® 2.0 (Personal) runs on separate infrastructure from Inheriti® Business, so you can retrieve your recovery key independently of your organisation's business environment.
What you need:
- Your SafeID login credentials
- Your mobile device with the SafeKey Mobile application installed or a SafeKey Pro device
Get started with Inheriti® 2.0 (Personal):
Share storage with SafeKey Mobile
Use SafeKey Mobile to store your recovery plan share and optionally back it up using one of the available cloud storage options: Inheriti® Vault, Google Drive or iCloud.
Follow the steps below to create the protection plan and store your plan share using SafeKey Mobile.
Step 1: In the setup dialog, select Prepare key, then Open Inheriti®.
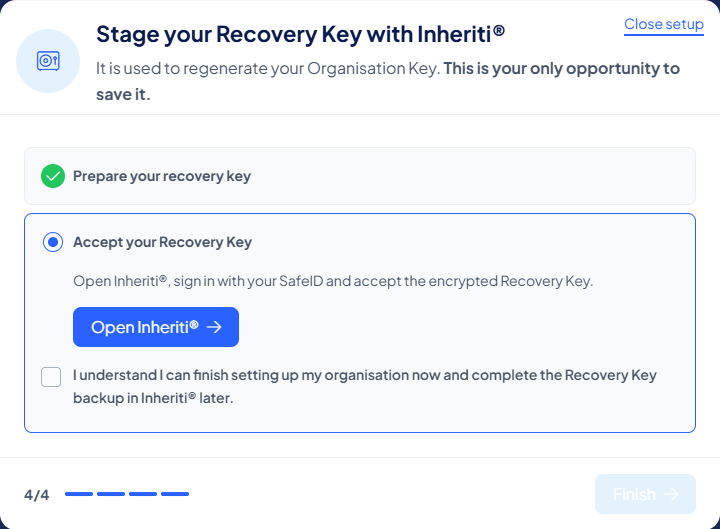
Step 2: Sign in with your SafeID.
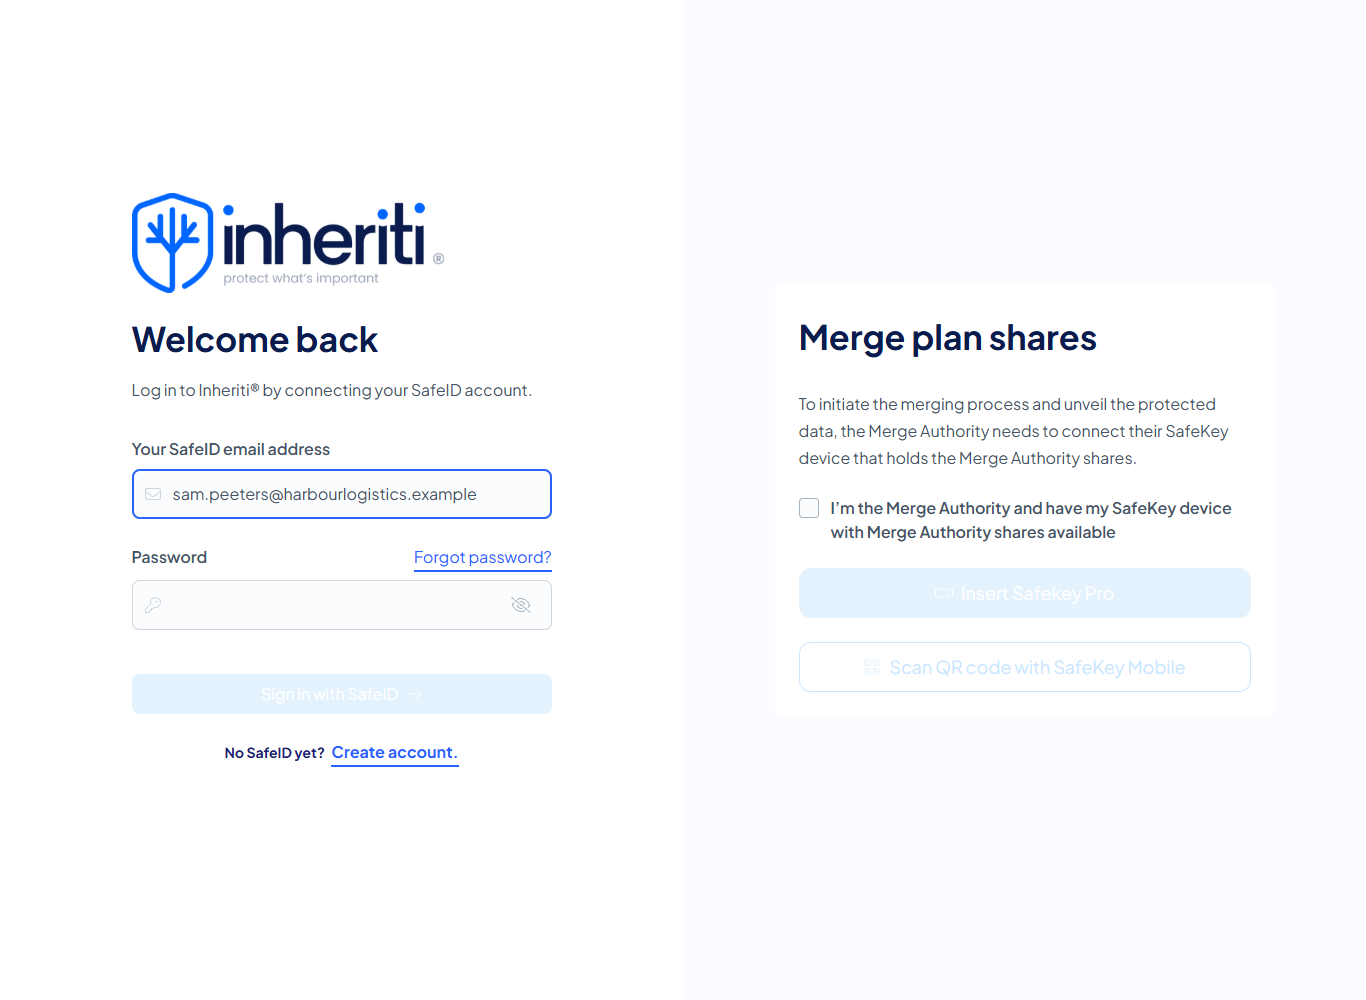
Step 3: Under Temporary secrets, select Add to Backup Plan next to your organisation.
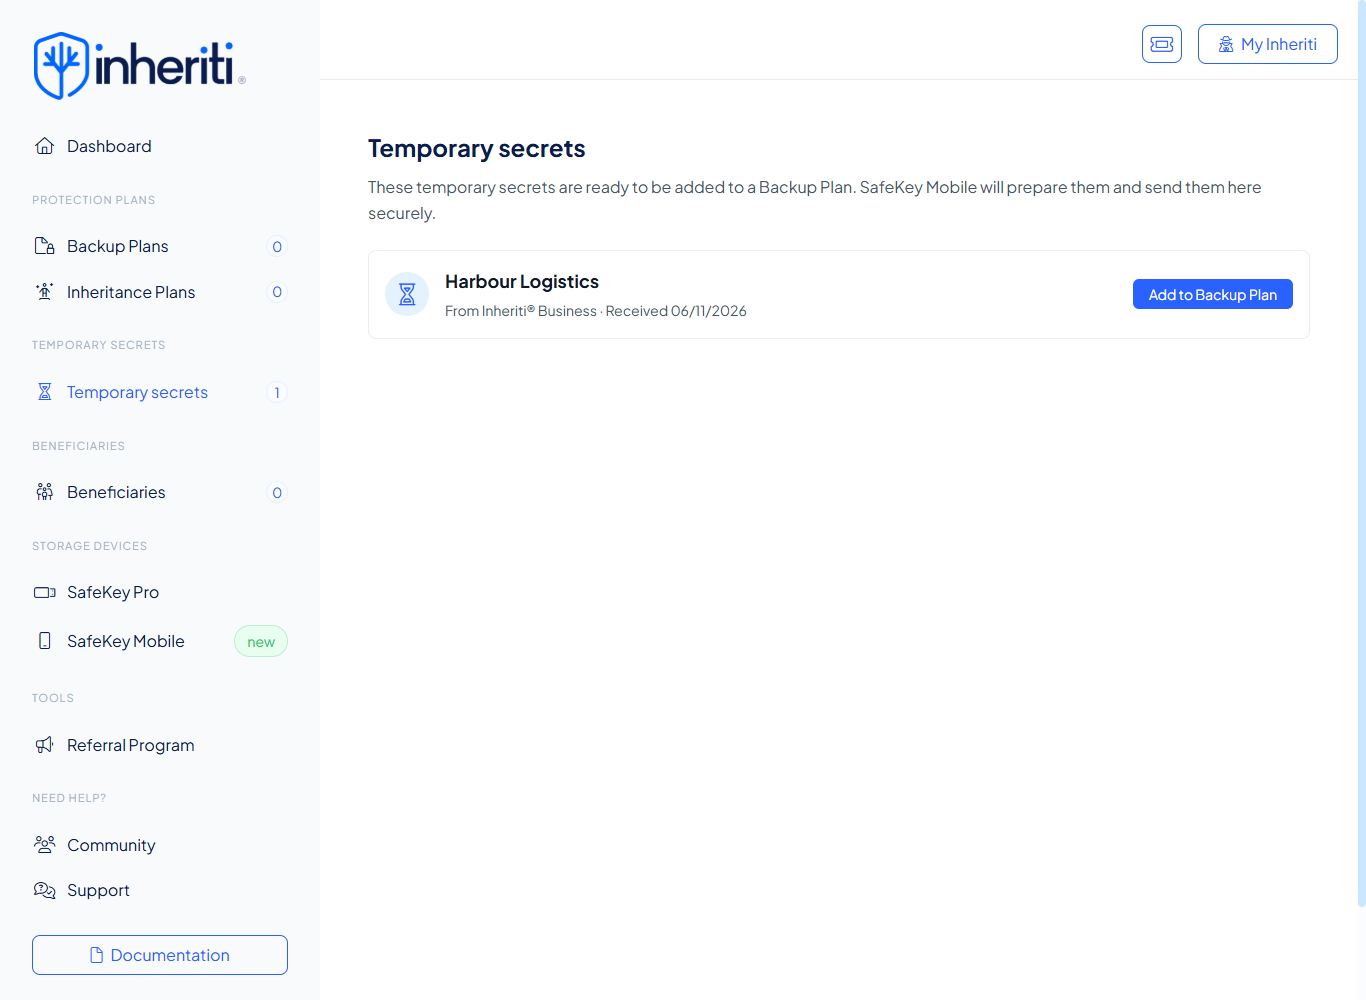
Step 4: Open SafeKey Mobile and keep it connected while your secret is transferred.
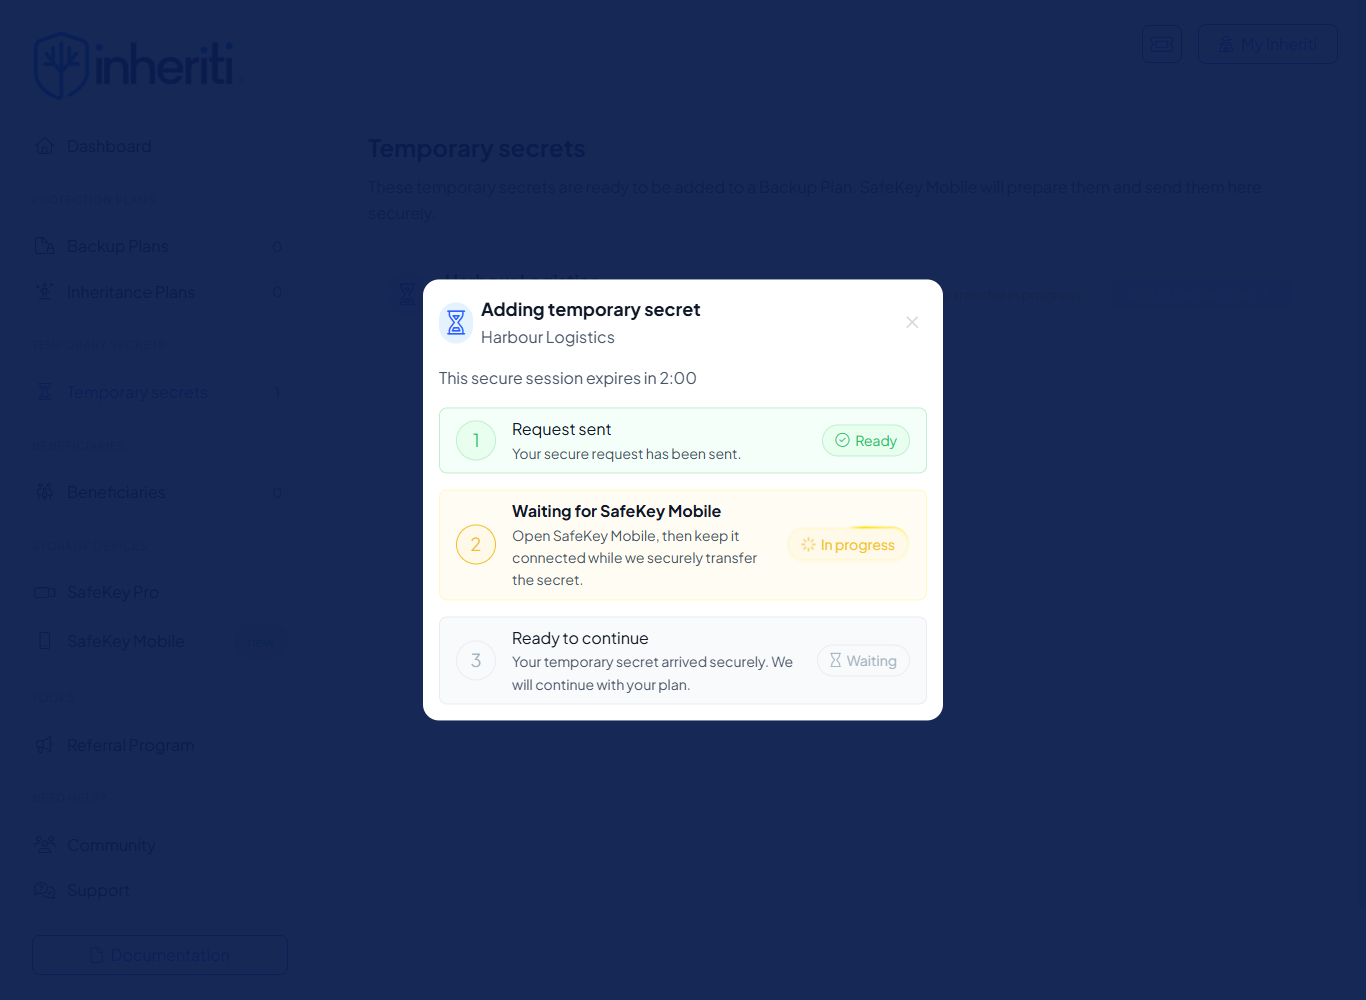
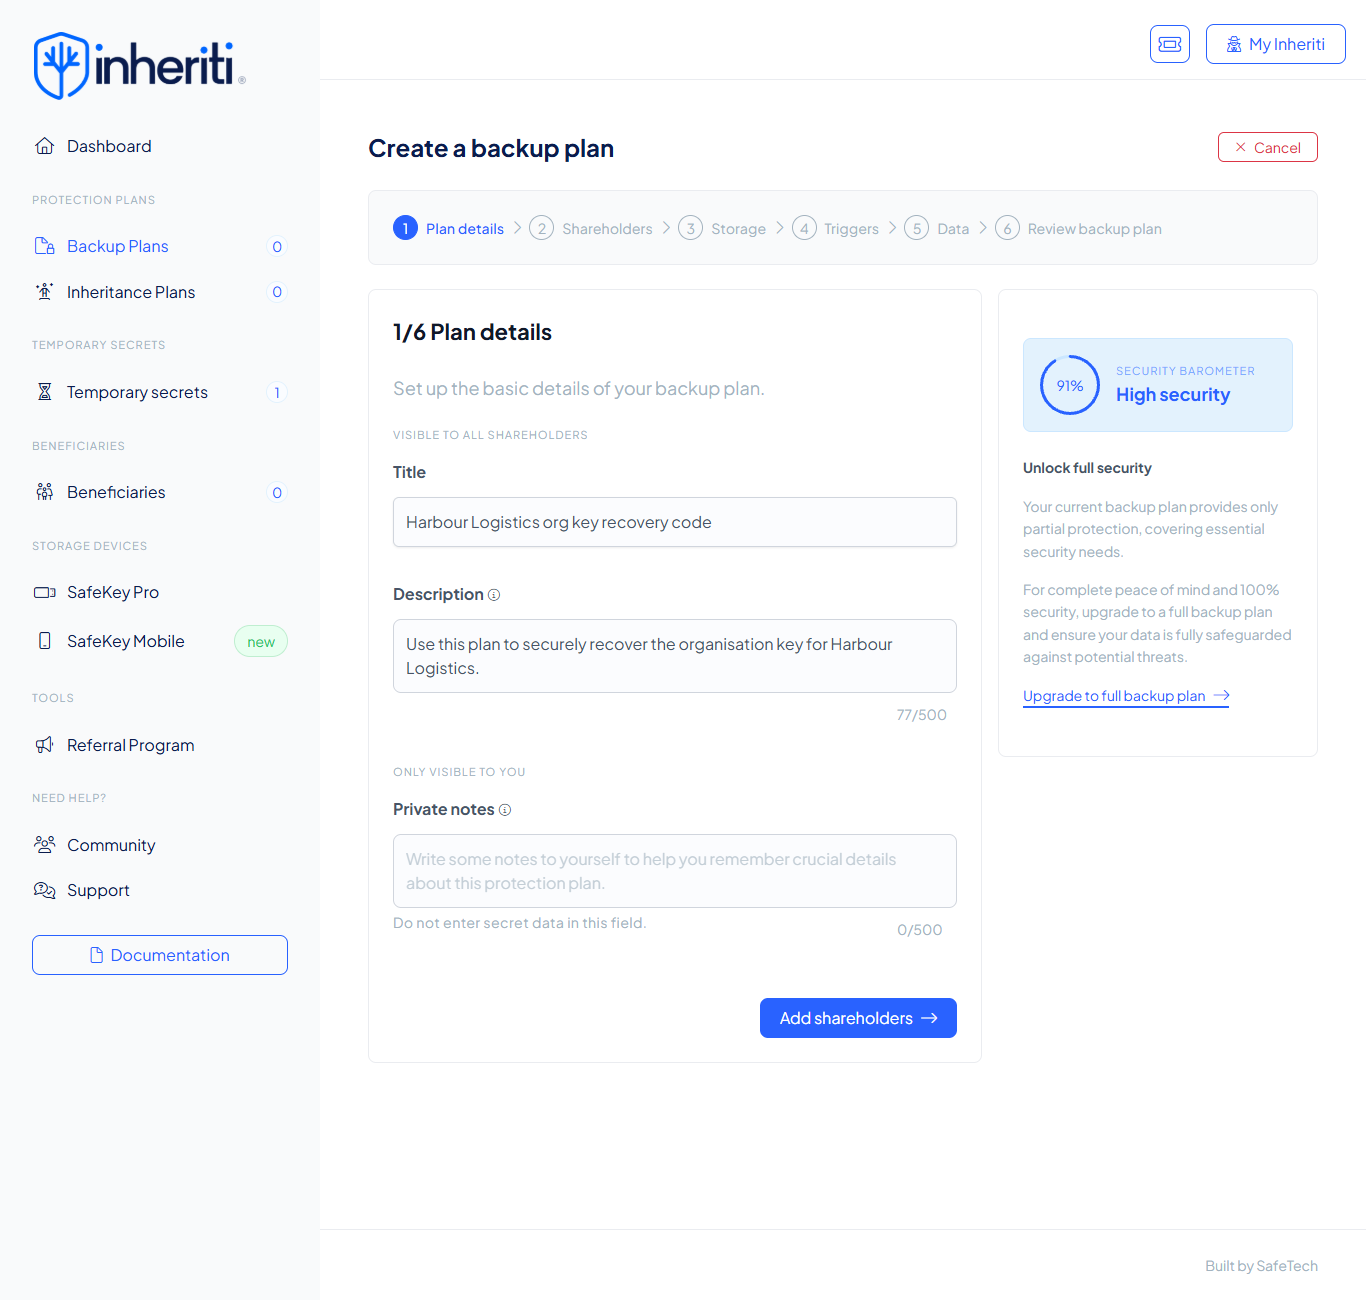
Step 5: Plan details: check the title and description of your plan, then select Add shareholders.
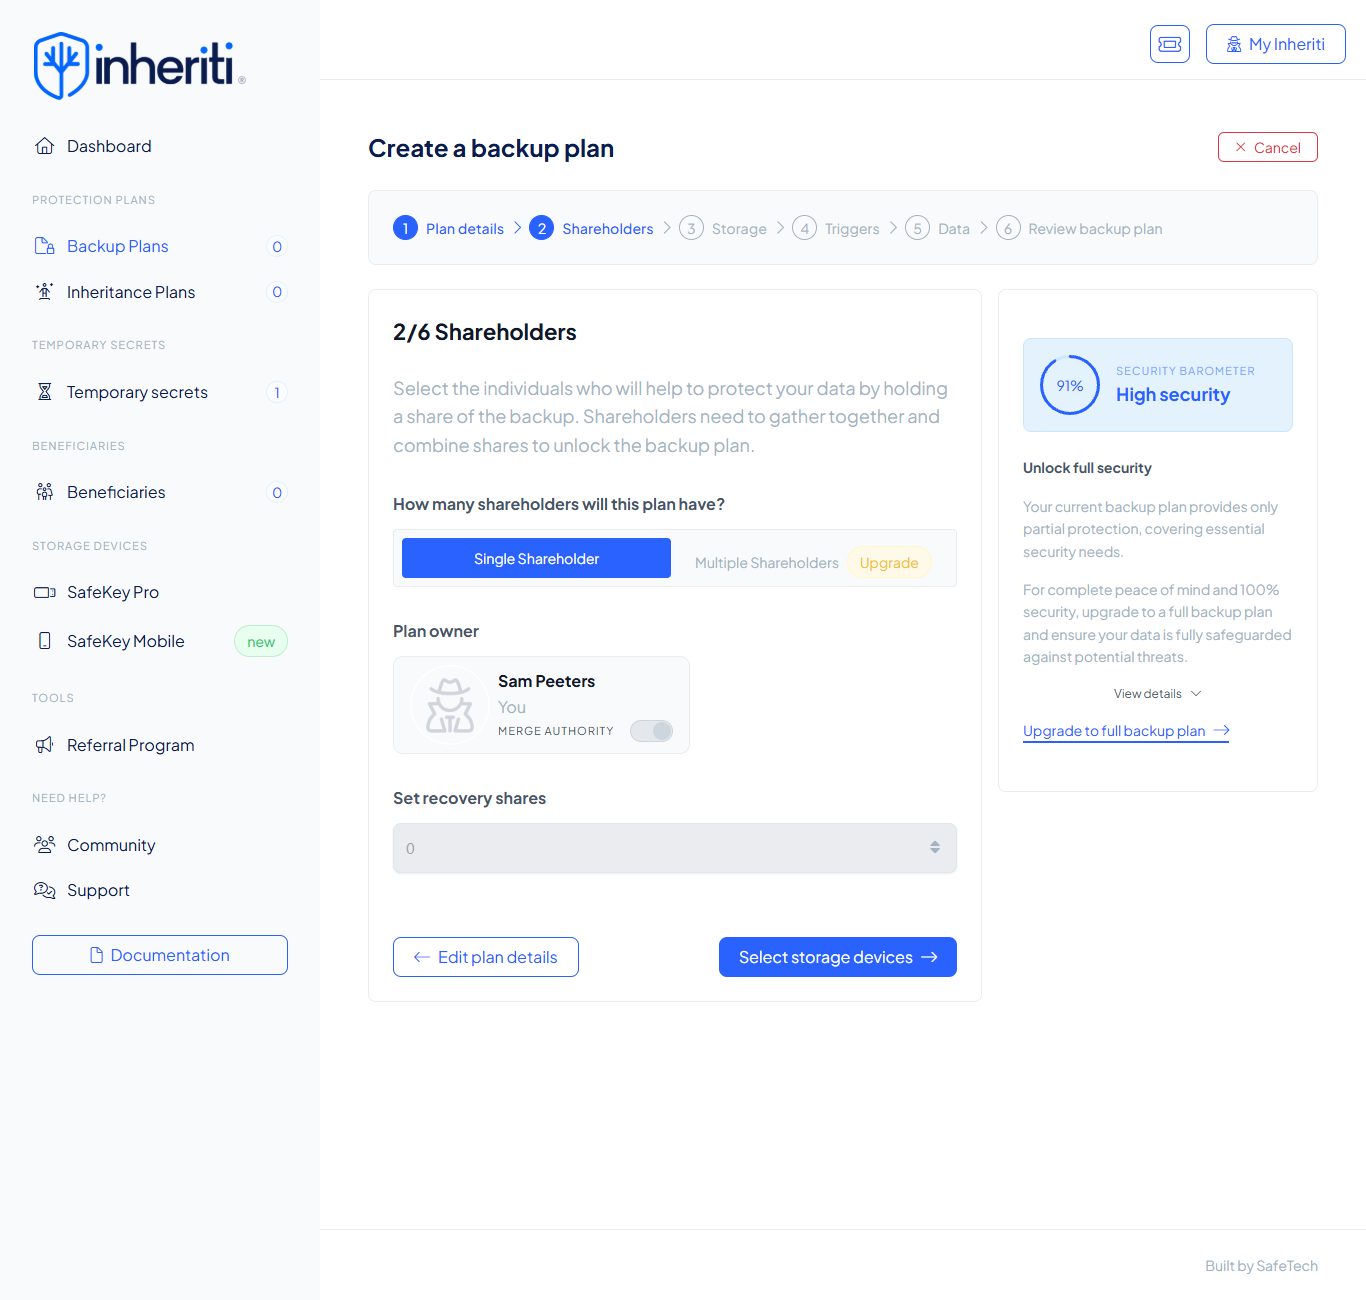
Step 6: Shareholders: keep yourself as the plan owner, then select Select storage devices.
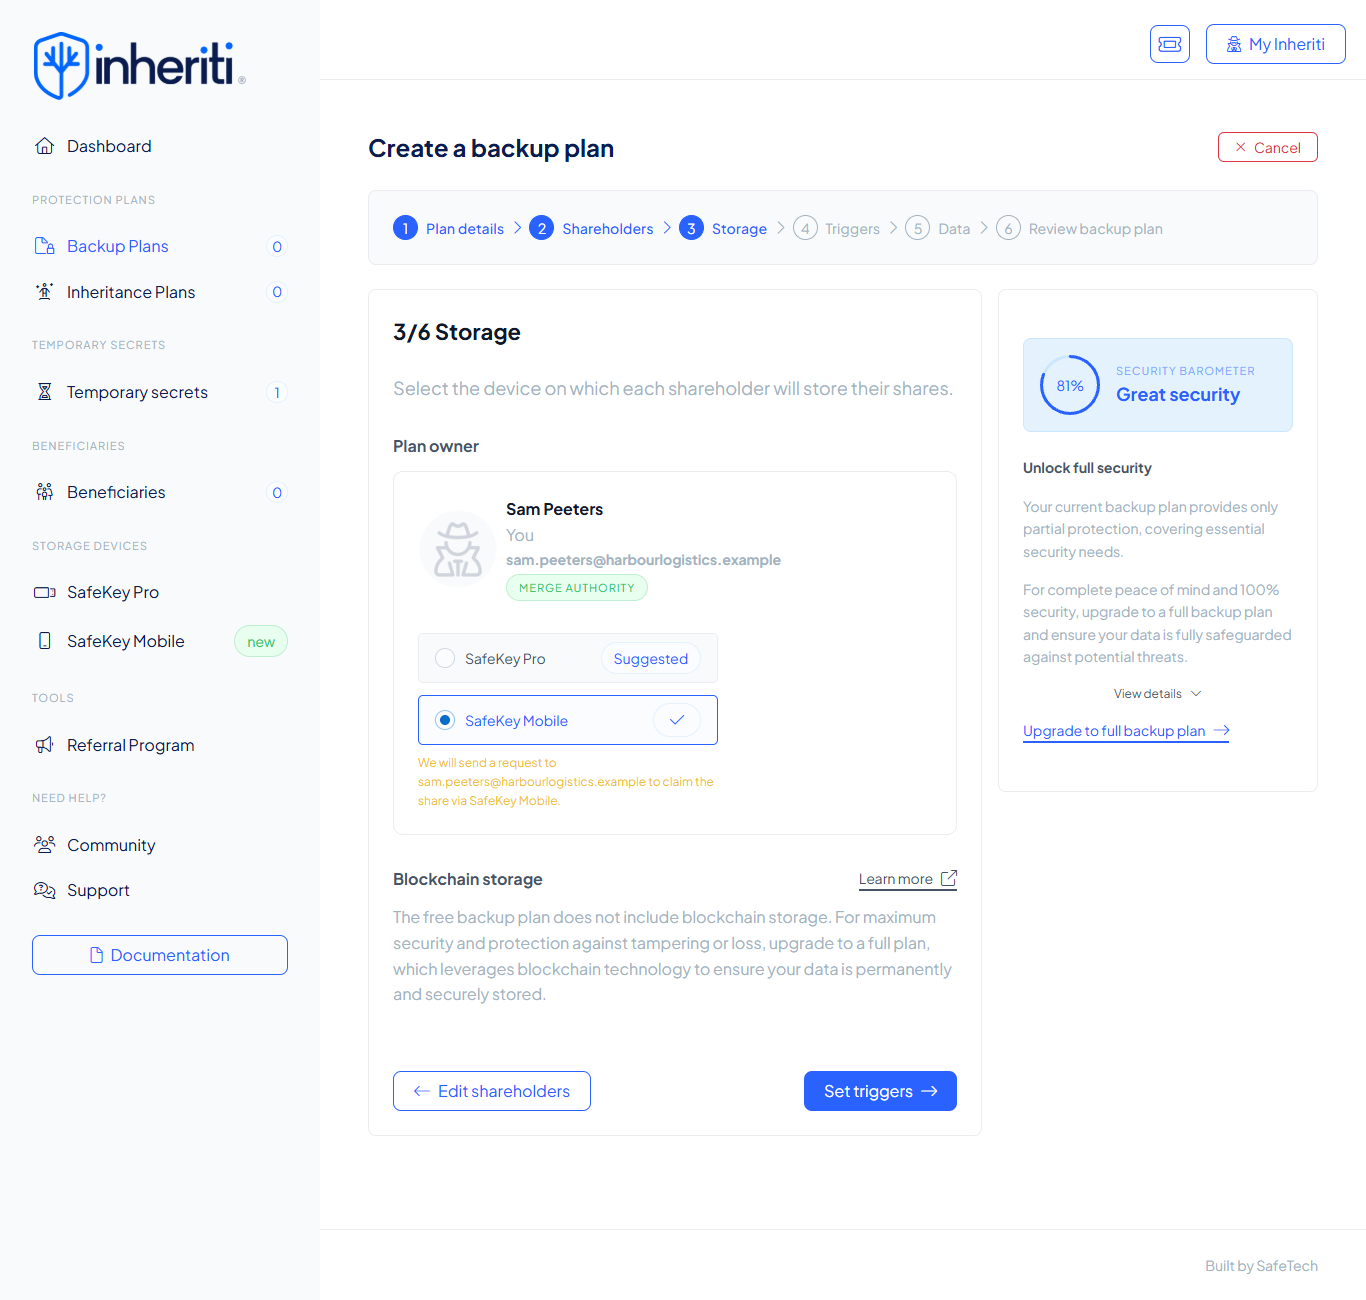
Step 7: Storage: select SafeKey Mobile, then Set triggers.
Step 8: Triggers: choose your triggers and their countdown, then select Add data.

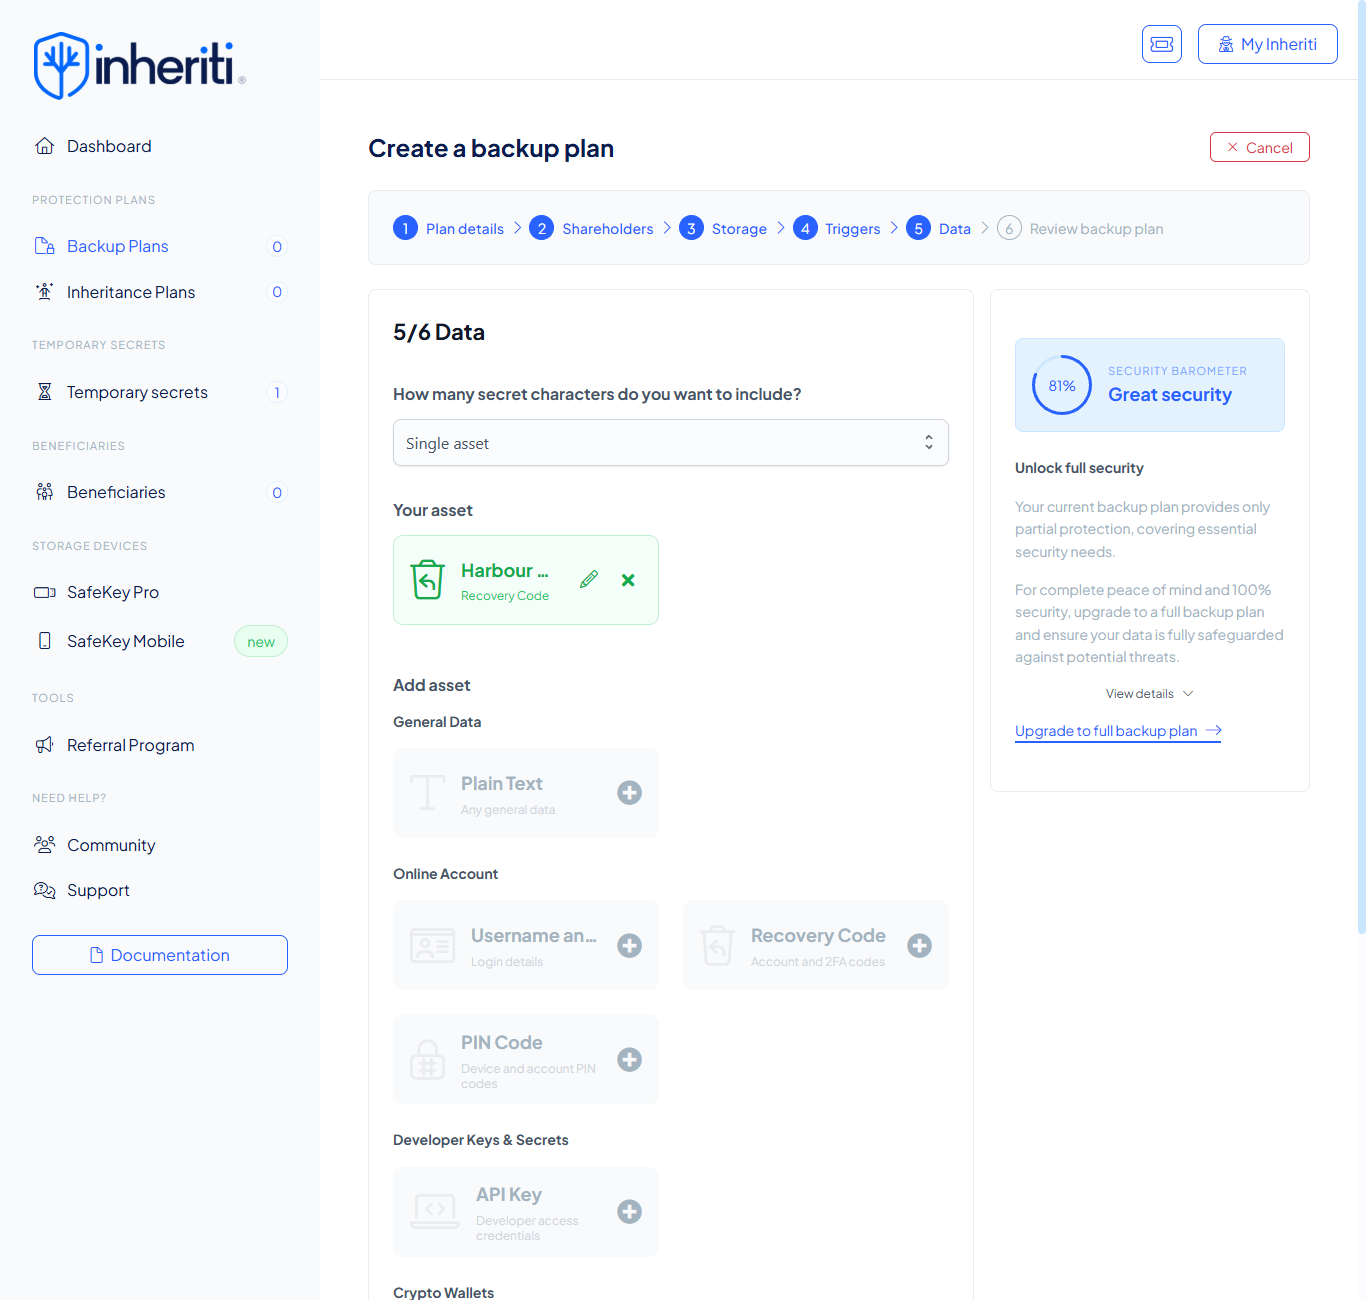
Step 9: Data: check that your Recovery Key is listed as your asset, then select Review backup plan.
Step 10: Review: tick I confirm my plan details, then select Create free backup plan.
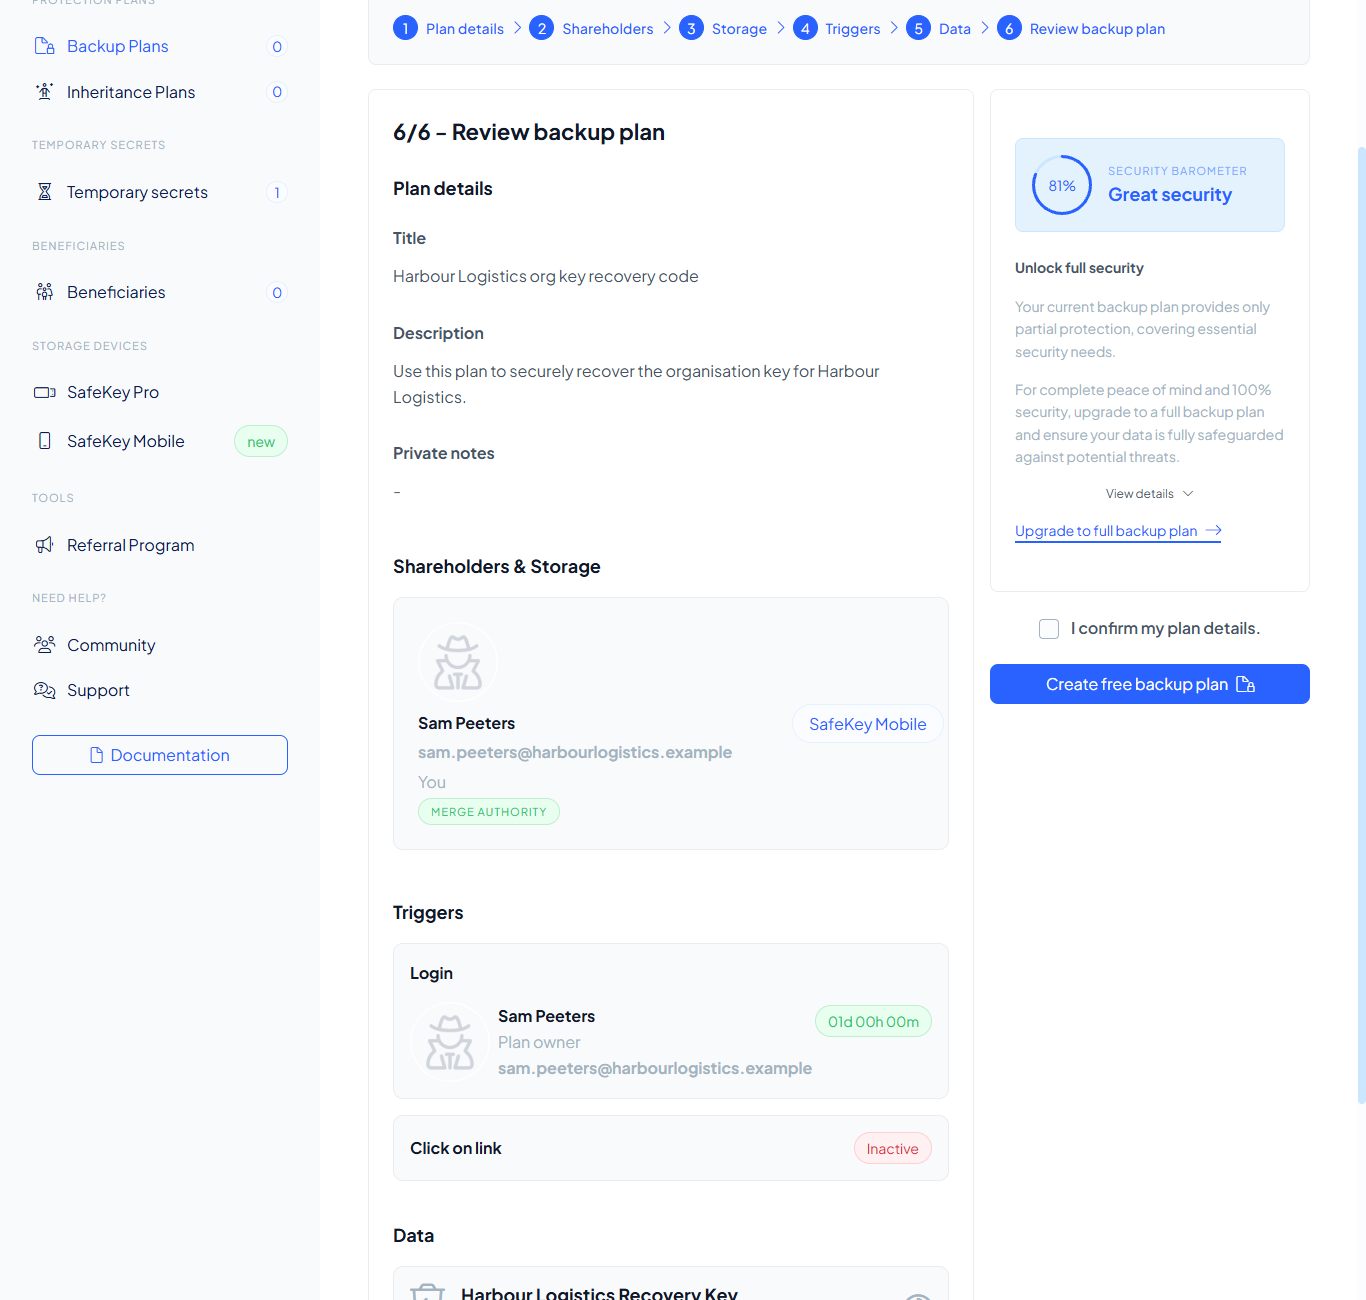
Step 11: Tick All mobile shareholders prepared their phone and installed SafeKey Mobile, then select Create plan.
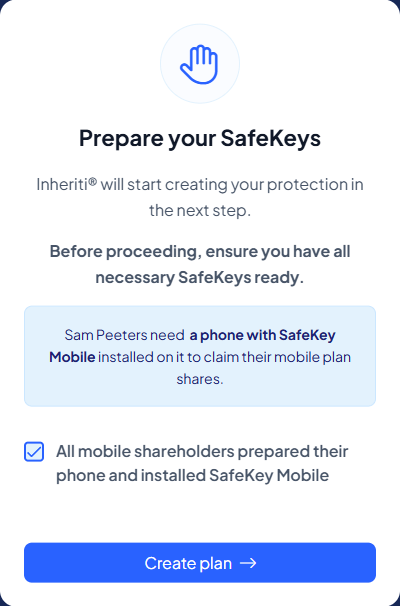
Step 12: Keep the page open until the plan has been created.
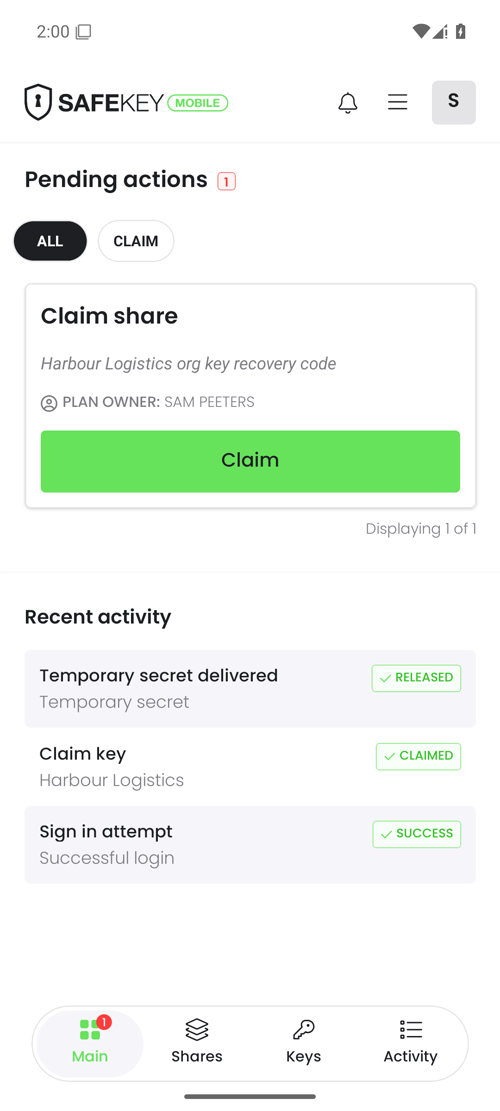
Step 13: In SafeKey Mobile, select Claim on the share of your plan.
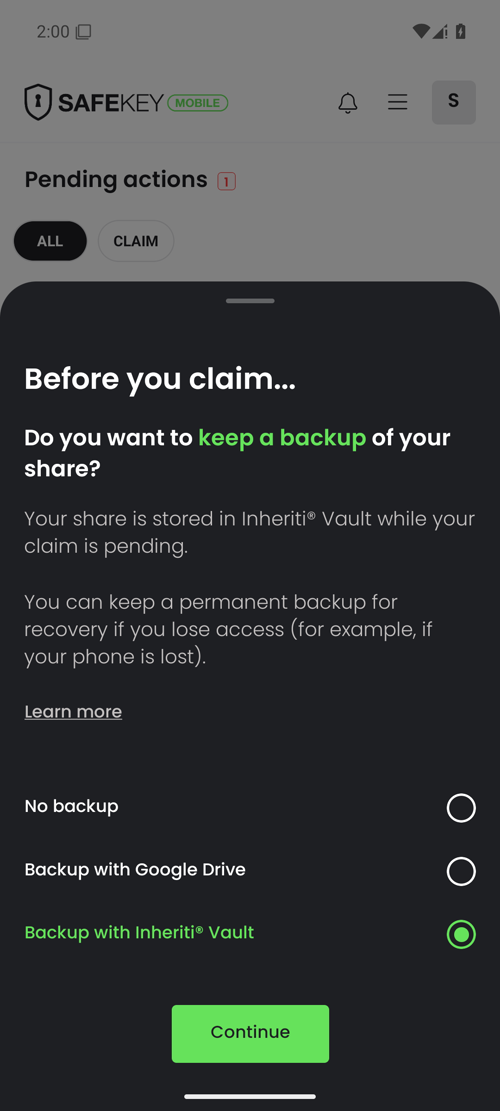
Step 14: Choose whether to keep a backup of your share, then select Continue.
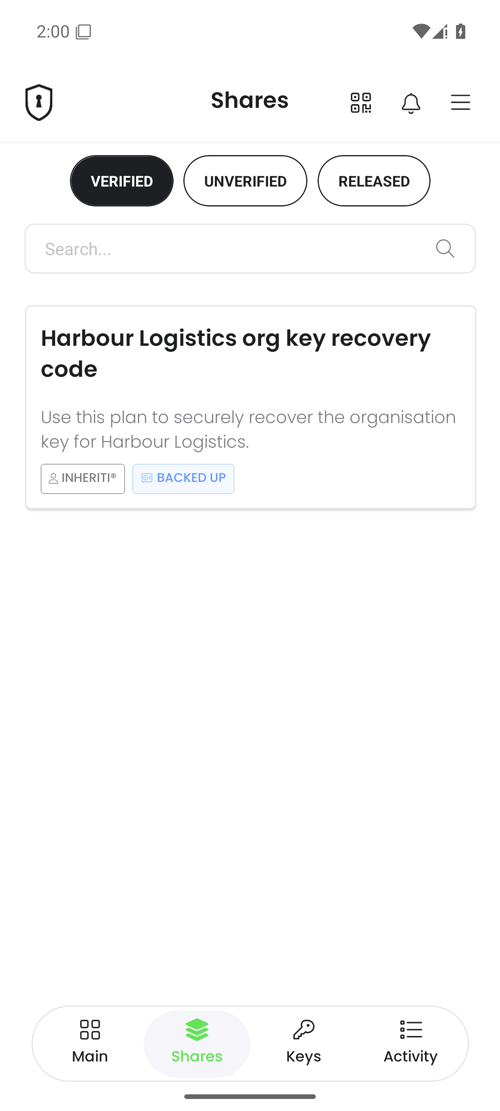
Step 15: Your share now appears under Shares, in the Verified tab.
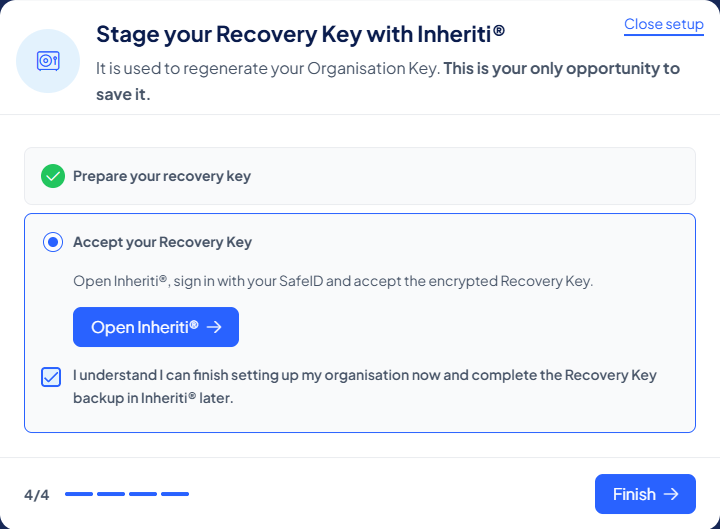
Step 16: Back in the setup dialog, tick the confirmation, then select Finish.
Share storage with SafeKey Pro
Store your recovery plan share on a SafeKey Pro device for offline, cold storage.
Follow the steps below to create your protection plan and store your plan share using SafeKey Pro.
The screenshots of the SafeKey Pro steps are preliminary and will be replaced.
Step 1: In the setup dialog, select Prepare key, then Open Inheriti®.
Step 2: Sign in with your SafeID.
Step 3: Under Temporary secrets, select Add to Backup Plan next to your organisation.
Step 4: Open SafeKey Mobile and keep it connected while your secret is transferred.
Step 5: Plan details: check the title and description of your plan, then select Add shareholders.
Step 6: Shareholders: keep yourself as the plan owner, then select Select storage devices.
Step 7: Storage: select SafeKey Pro, then Set triggers.
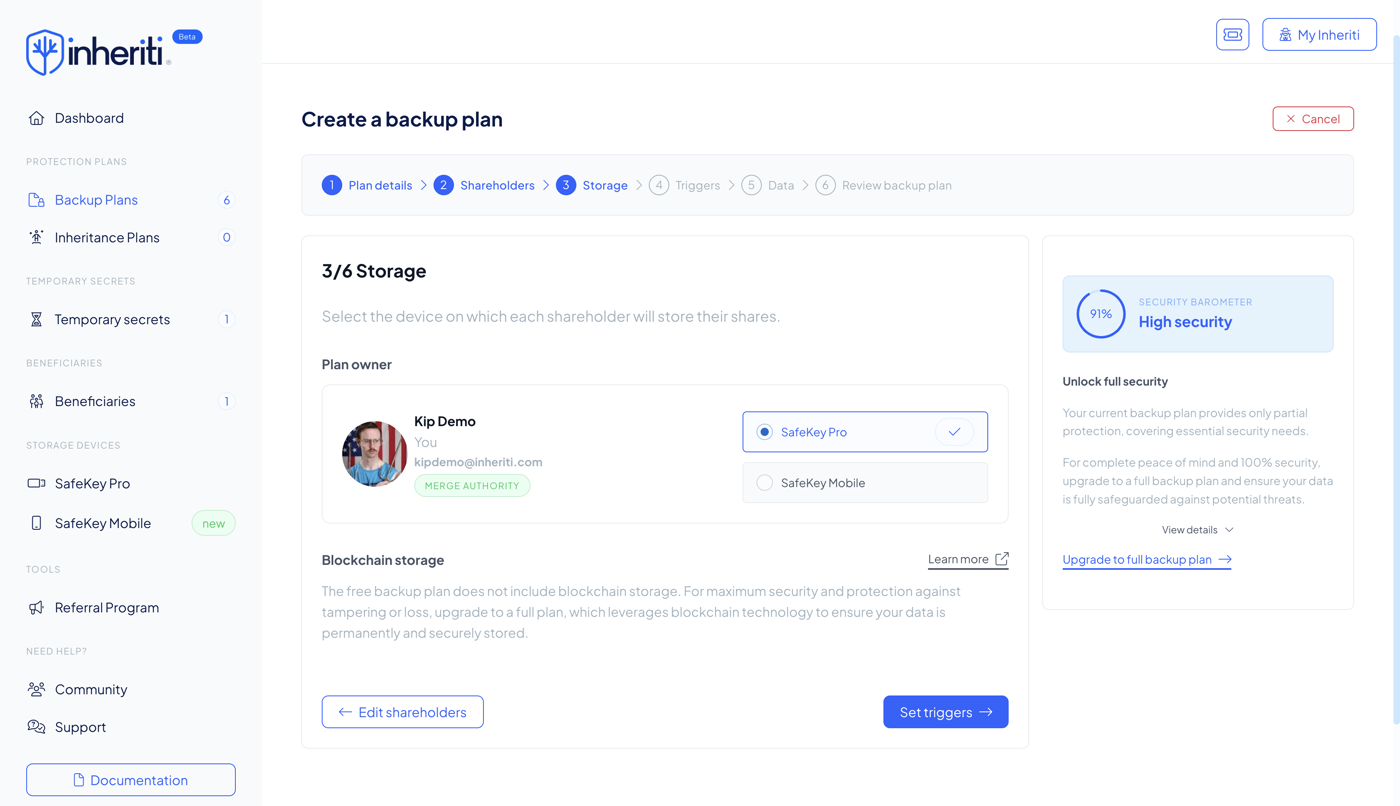
Step 8: Triggers: choose your triggers and their countdown, then select Add data.
Step 9: Data: check that your Recovery Key is listed as your asset, then select Review backup plan.
Step 10: Review: tick I confirm my plan details, then select Create free backup plan.
Step 11: Tick All required SafeKey Pros are present, then select Create plan.
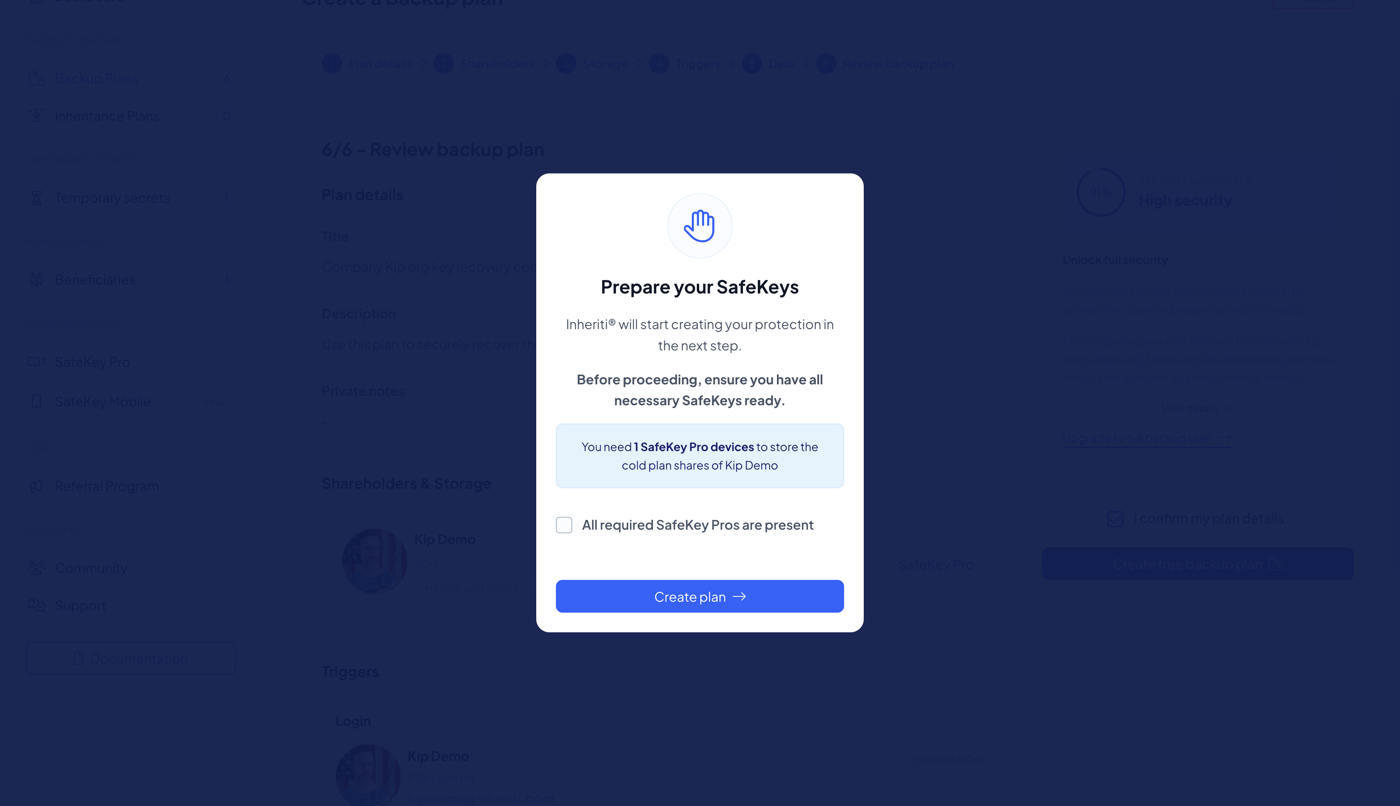
Step 12: Insert your SafeKey Pro, then select SafeKey Pro is connected.
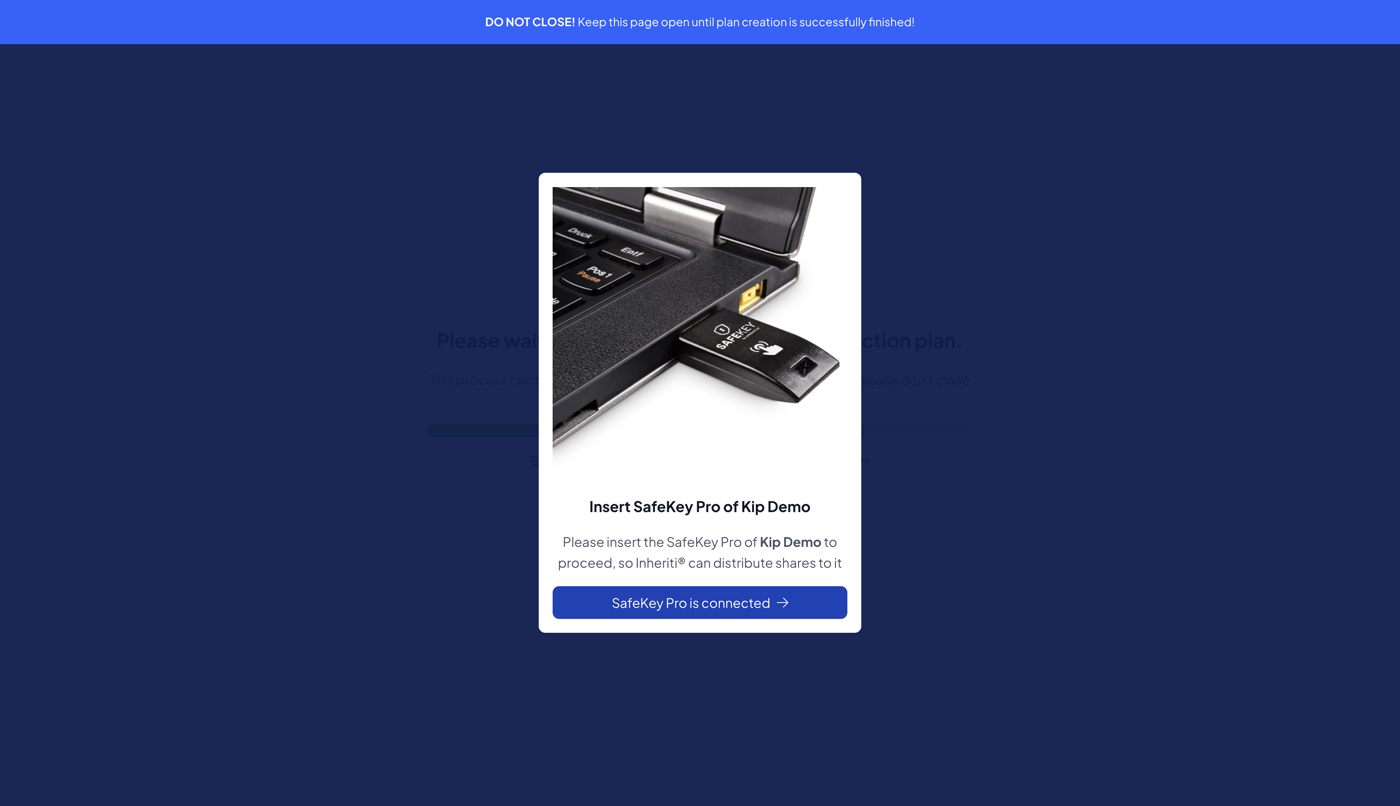
Step 13: Enter your PIN, then select Confirm PIN.
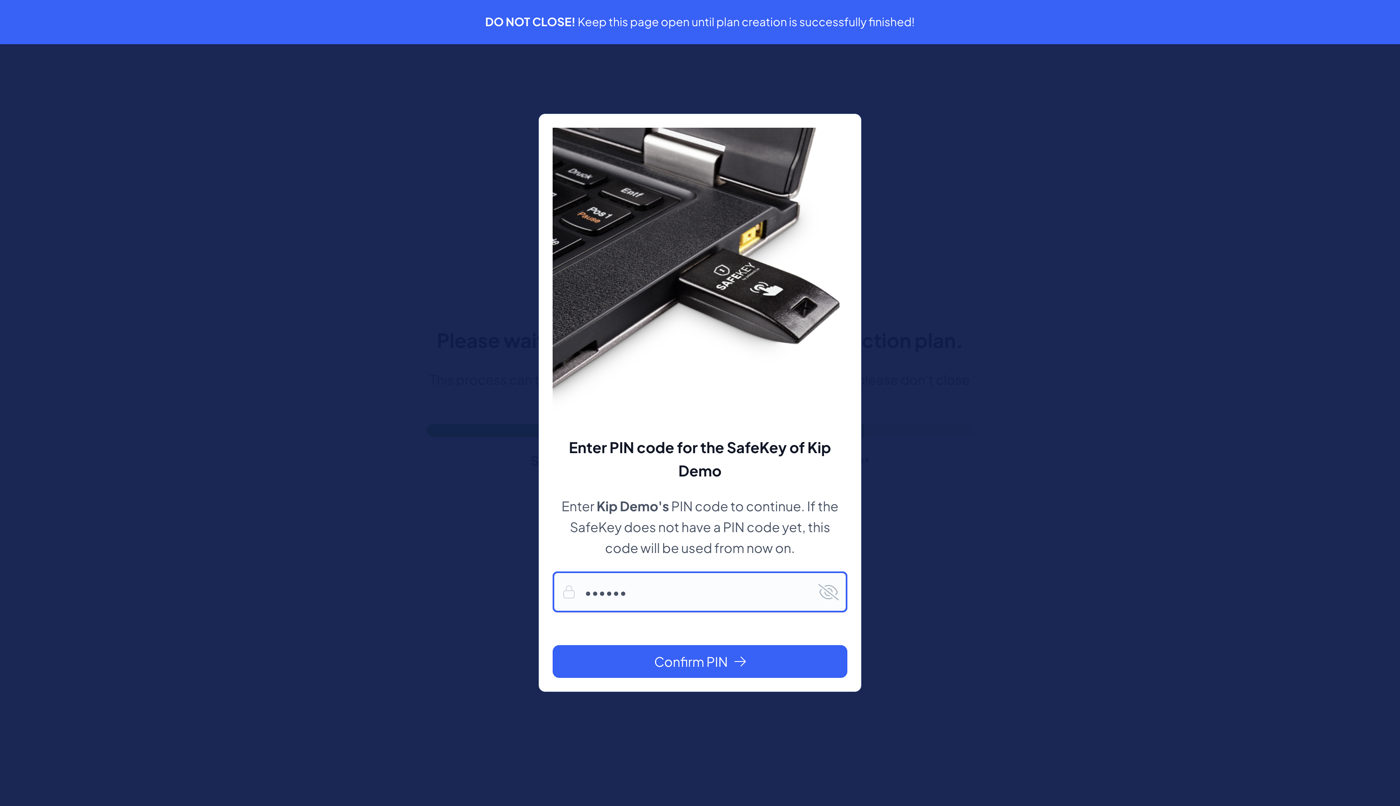
Step 14: Wait while the shares are written to your SafeKey Pro, and keep the page open.
Step 15: Remove your SafeKey Pro, tick the confirmation, then select Complete plan creation.
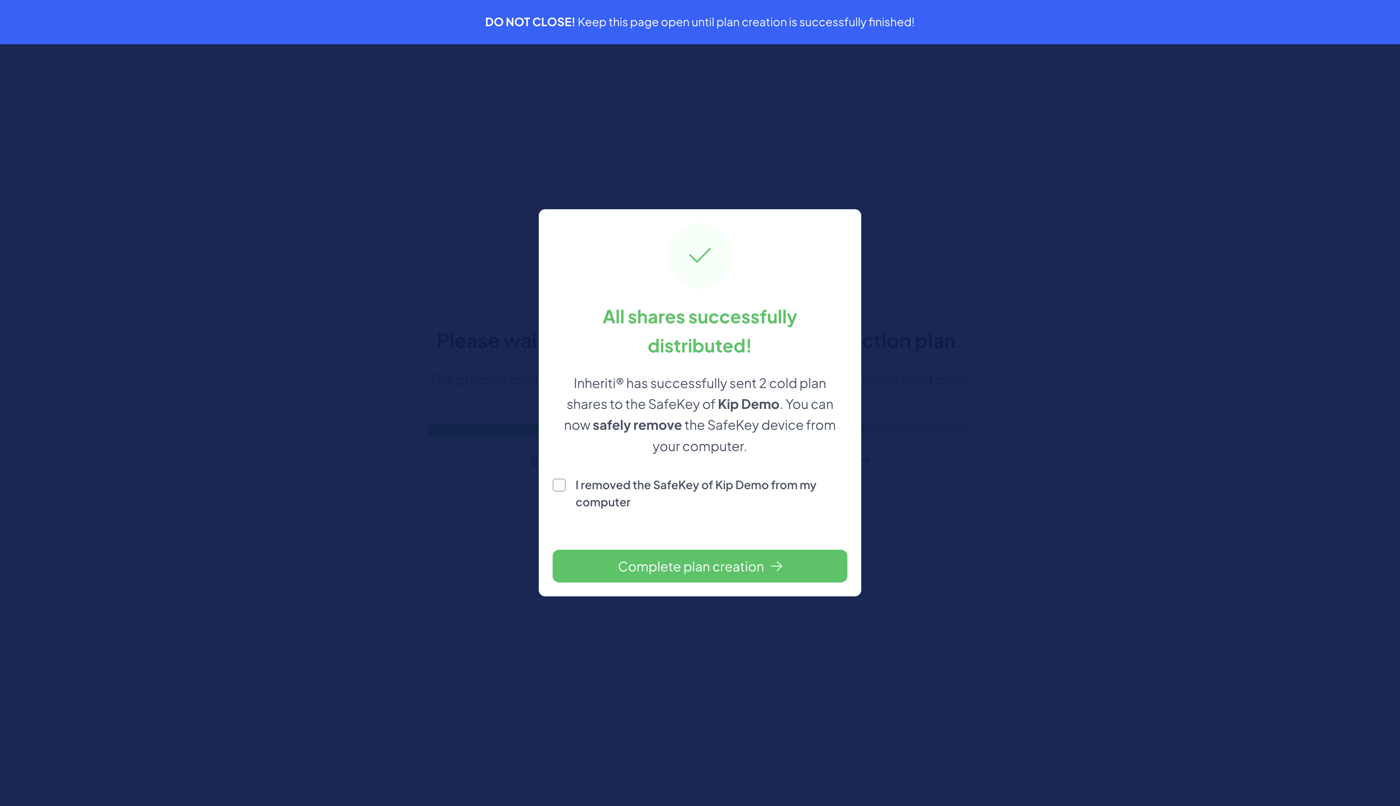
Step 16: Back in the setup dialog, tick the confirmation, then select Finish.
Option 2: Save manually
If you choose to back up your Organisation Recovery Key manually, write it down and store it somewhere safe offline. You are responsible for choosing a suitable storage method and keeping your recovery key secure.